In today’s demo, we are going to scan images and place objects on the screen. After that, we will fill colours on objects parts.
Let’s get started.
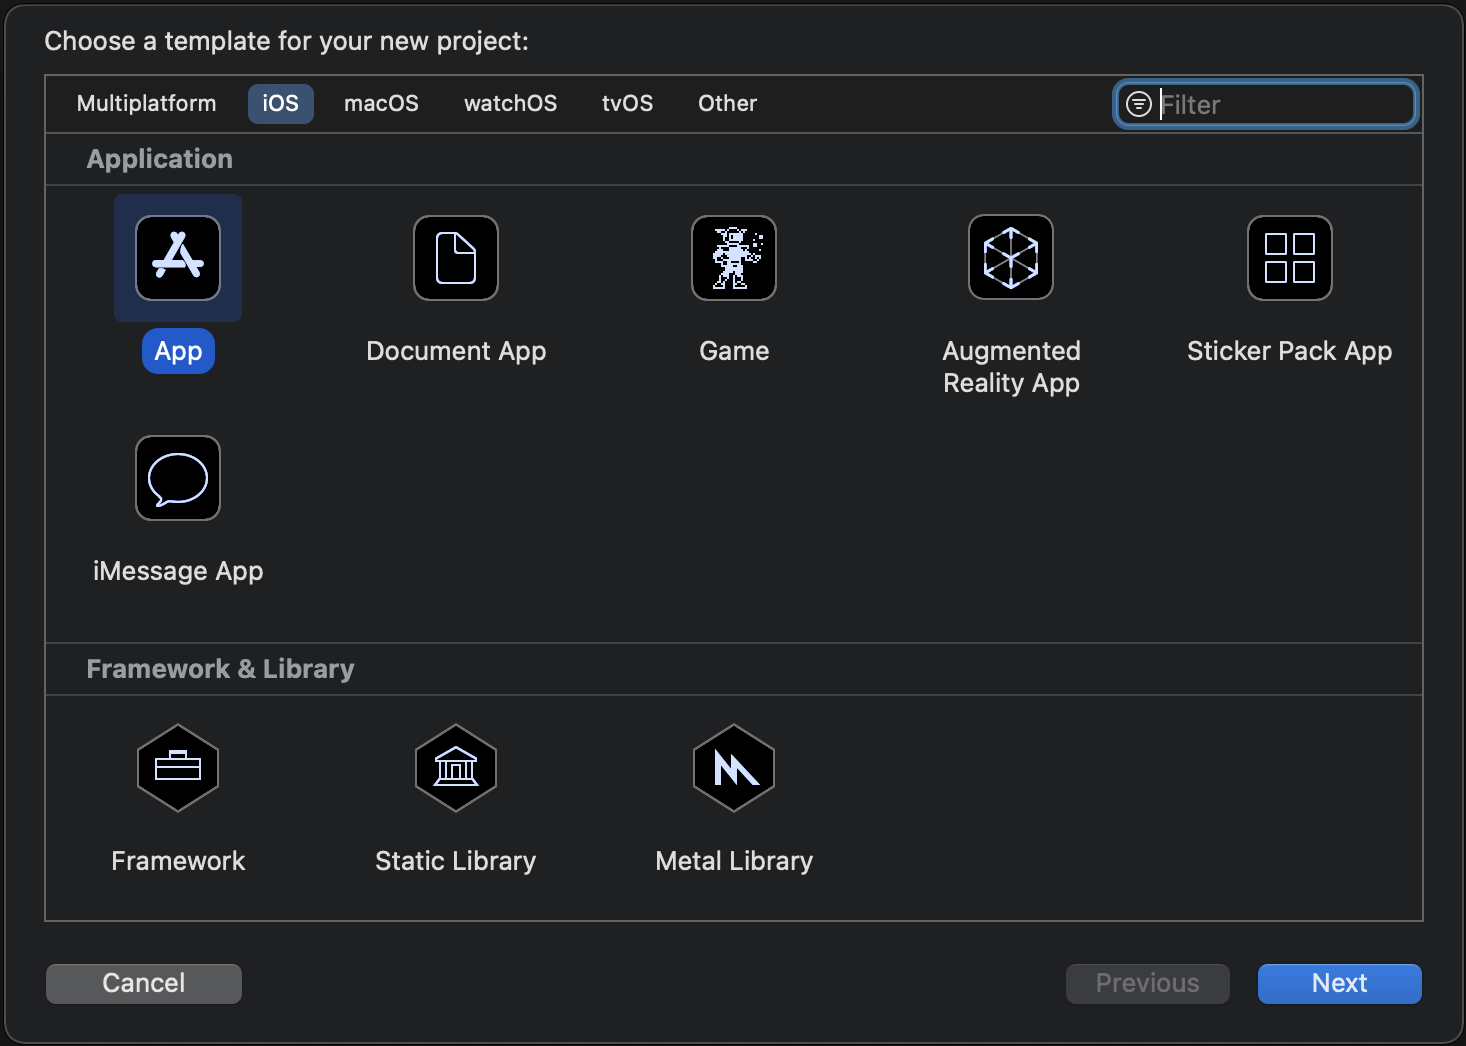
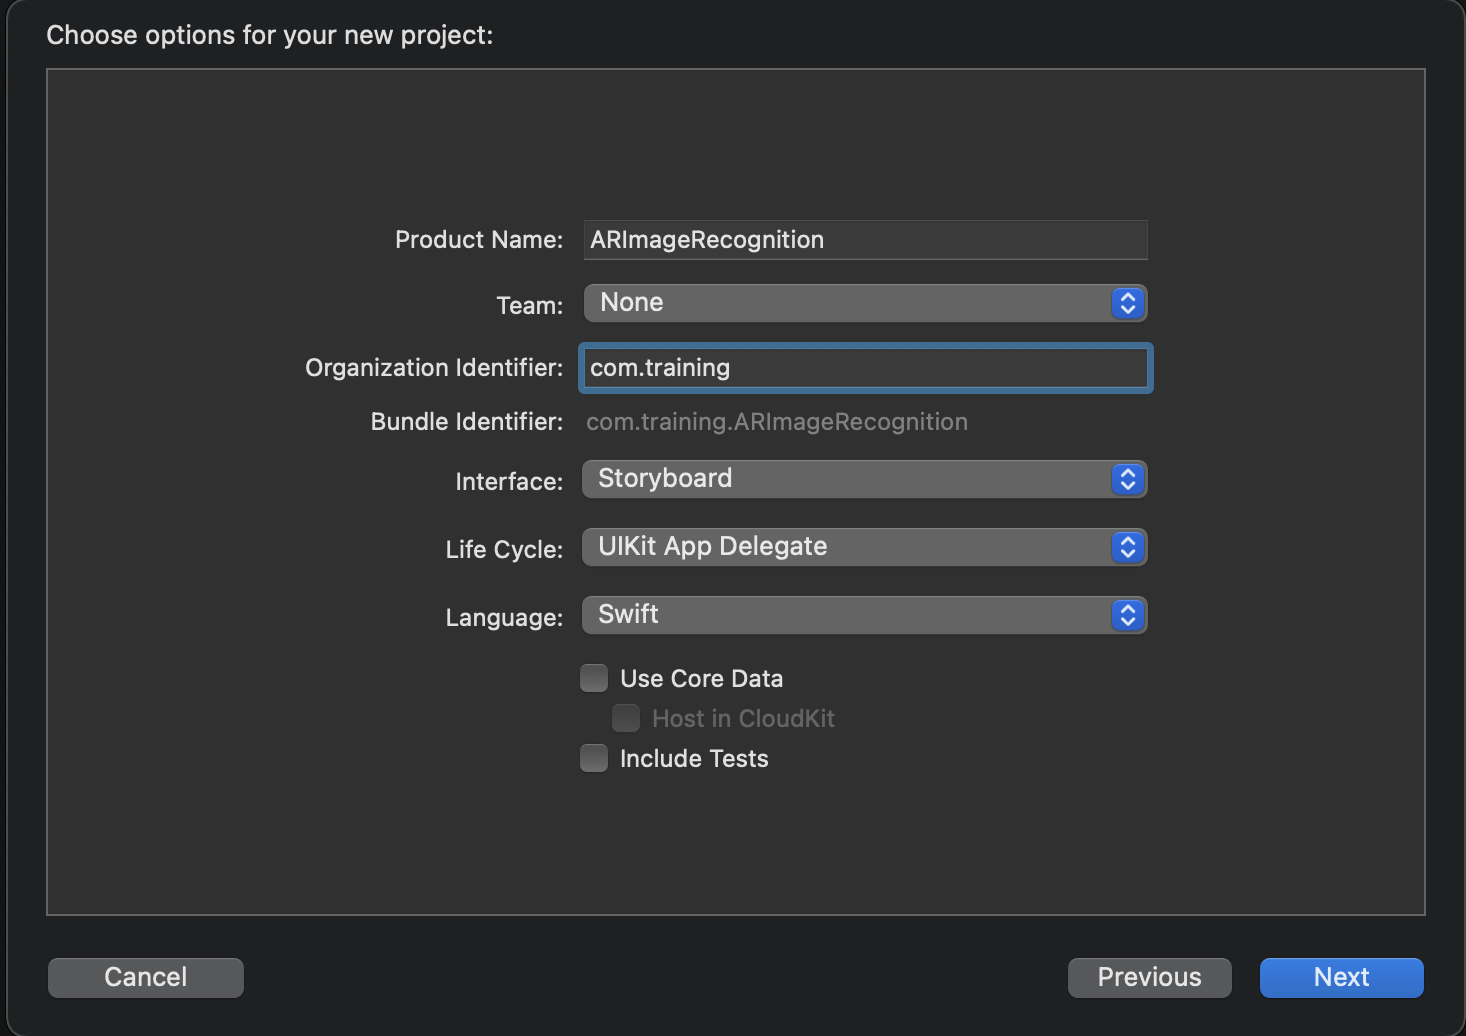
Open Xcode -> Create New project -> Select options as mentioned in below image.
Open Main. storyboard file, add sceneKit view, button, label to the ViewController and add constraints to it.
Open ViewController.swift file and import below 2 libraries which are provided by apple default. After that, connect the scenekit with the outlet. Set delegate of sceneView inside viewDidLoad().
import ARKit
import SceneKit
@IBOutlet weak var sceneView: ARSCNView!
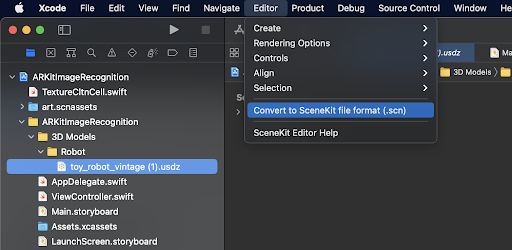
Download object file from below mentioned link and add into app after that convert it to .scn file as mentioned below:
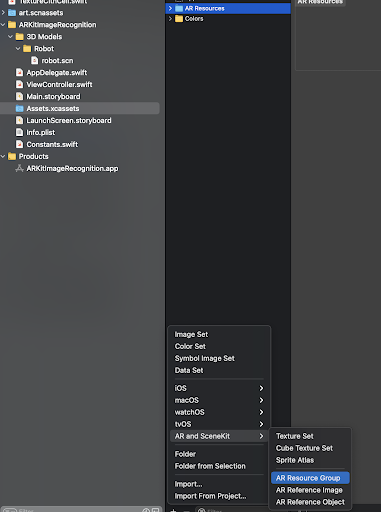
Open Assets.xcassets -> Click on + from the bottom left corner as shown in below image. Add Robot image into AR Resources group and name it to Robot (It is case-sensitive).
Create fade duration related variables.
let fadeDuration: TimeInterval = 0.3
let rotateDuration: TimeInterval = 5
let waitDuration: TimeInterval = 0.5

//MARK: create fade and spin action variable
lazy var fadeAndSpinAction: SCNAction = {
return .sequence([
.fadeIn(duration: fadeDuration),
.rotateBy(x: 0, y: 0, z: CGFloat.pi * 360 / 180, duration: rotateDuration),
.wait(duration: waitDuration),
])
}()

//MARK: create fade action variable
lazy var fadeAction: SCNAction = {
return .sequence([
.fadeOpacity(by: 0.8, duration: fadeDuration),
.wait(duration: waitDuration),
.fadeOut(duration: fadeDuration)
])
}()

//MARK: create SCNNode node type as robot node
lazy var robotNode: SCNNode = {
//create scene and replace robot.scn with your .scn filename
guard let scene = SCNScene(named: "robot.scn"),
//Add all child nodes of robot node
let node = scene.rootNode.childNode(withName: "robot", recursively: false) else { return SCNNode() }
let scaleFactor = 0.024

//all nodes added into this array
var nodeArray = scene.rootNode.childNodes
for childNode in nodeArray {
node.addChildNode(childNode as SCNNode)
}

node.scale = SCNVector3(scaleFactor, scaleFactor, scaleFactor)
node.pivot = SCNMatrix4MakeTranslation(0, 0, 0)
node.eulerAngles.x += -.pi / 2

//1. Get The Bounding Box Of The Node
let minimum = float3(node.boundingBox.min)
let maximum = float3(node.boundingBox.max)

//2. Set The Translation To Be Half Way Between The Vector
let translation = (maximum - minimum) * 0.5

//3. Set The Pivot
node.pivot = SCNMatrix4MakeTranslation(translation.x, translation.y, translation.z)

return node
}()
Add tap gesture on scene view and call if from viewDidLoad().
//MARK: add tap gesture on the scene view
func registerGestureRecognizer() {
let tap = UITapGestureRecognizer(target: self, action: #selector(didTapped))
self.sceneView.addGestureRecognizer(tap)
}
Configure lighting for scenview at the load time.
func configureLighting() {
sceneView.autoenablesDefaultLighting = true
sceneView.automaticallyUpdatesLighting = true
}
Replace your viewDidLoad() function with below.
override func viewDidLoad() {
super.viewDidLoad()
sceneView.delegate = self
configureLighting()
registerGestureRecognizer()
}
Add ARSCNViewDelegate to ViewController class.
extension ViewController: ARSCNViewDelegate {
//It renders image using camera ad gives name of the image
func renderer(_ renderer: SCNSceneRenderer, didAdd node: SCNNode, for anchor: ARAnchor) {
DispatchQueue.main.async {
guard let imageAnchor = anchor as? ARImageAnchor,
let imageName = imageAnchor.referenceImage.name else { return }
// TODO: Overlay 3D Object
let overlayNode = self.getNode(withImageName: imageName)
overlayNode.opacity = 0
overlayNode.position.y = 0.2
overlayNode.geometry?.firstMaterial!.diffuse.contents = nil
let moveLoop = SCNAction.repeatForever(self.fadeAndSpinAction)
overlayNode.runAction(moveLoop)
node.addChildNode(overlayNode)

self.label.text = "Image detected: \"\(imageName)\""
}
}

func getPlaneNode(withReferenceImage image: ARReferenceImage) -> SCNNode {
let plane = SCNPlane(width: image.physicalSize.width,
height: image.physicalSize.height)
let node = SCNNode(geometry: plane)
return node
}

func getNode(withImageName name: String) -> SCNNode {
var node = SCNNode()
switch name {
case "Robot":
node = robotNode
default:
break
}
return node
}
}
create UIColor extension to generate random colors and assign it to tapped nodes.
extension UIColor {
/**
* Example:
* self.backgroundColor = UIColor.random
*/
static var random: UIColor {
let r:CGFloat = .random(in: 0…1)
let g:CGFloat = .random(in: 0…1)
let b:CGFloat = .random(in: 0…1)
return UIColor(red: r, green: g, blue: b, alpha: 1)
}
}
Get node name of tapped and fill color on that particular node
@objc func didTapped(sender: UITapGestureRecognizer) {

let location = sender.location(in: sceneView)
let results = sceneView.hitTest(location, options: [SCNHitTestOption.searchMode : 1])
print("Touched node name : \(results.first?.node.name)")

results.first?.node.geometry?.firstMaterial?.diffuse.contents = UIColor.random
results.first?.node.geometry?.firstMaterial?.specular.contents = UIColor.white
}
For more details regarding Object color change using ARKit, contact us.
Groundbreaking AI technologies are rapidly changing how search engines operate. SEO experts and marketers are…
The healthcare industry is undergoing a profound transformation, fueled by the convergence of Artificial Intelligence…
Healthcare is seeing massive technological advancements in patient-centric approaches and custom healthcare software development. Unlike…
The healthcare industry is continuously evolving, and one of the most significant changes occurring in…
The integration of analytics into healthcare apps has transformed how healthcare is managed and delivered.…
The healthcare industry is experiencing rapid digital transformation, with healthcare apps taking center stage in…